Happy hump, y’all! First things first: a SUPER special guest was hangin’ out at CUR headquarters with me yesterday, and I absolutely have to introduce you to her. Meet Sarah – my new intern at Coming Up Roses for the summer!!! I cannot even begin to explain my extreme excitement at this. This girl is golden, and I’m straight up honored that she’s cool hanging out with me all day helping out. Here’s her spiel:
Sarah Hanlon is a rising sophomore majoring in Journalism at Hofstra University in Long Island, New York. When she’s not binge watching The Bachelor or any TLC wedding-themed show, she’s most likely scrolling through social media (you can find her on Twitter and Instagram at sarahhanlon_), reading People magazine or writing about the latest beauty and fashion trends for Hofstra’s chapter of Her Campus. She lives her life by the motto “What Would Kate Middleton Do?” and is always searching for the perfect pink lipstick or pair of shoes to fuel her never ending shopping addiction. As a longtime reader of Coming Up Roses, she’s always on the lookout for the rosy good stuff that every girl needs in her life (in addition to a good cup of coffee!)

EVERYONE WELCOME SARAH IN THE ROSIEST WAY POSSIBLE. She’s the biggest sweetheart and funny as heck, and my cats love her. (Didja catch our Snapchat intro??)
Anyhoo, back to iPhone flat lay photography tips, shall we?
ICYMI, a “flatlay” is the term used to describe the popular overhead shots you see all over Instagram – where pieces are – you guessed it! – laid onto a flat surface and photographed for popular enjoyment. And when it comes to flatlays, you do NOT need a fancy schmancy DSLR camera to get the job done. Your iPhone (or other smartphone) will do the trick, and these 11 iPhone flat lay photography tips will give your flatlay game the necessary boost!
11 FLAT LAY PHOTOGRAPHY TIPS
Be balanced.
This was the golden rule from this post, and I’m recycling it back here again because it really is the golden rule. One of the most important aspects of nailing the iPhone flatlay photography game is the biggest “B” word of all time: BALANCE. Shapes, colors, textures…it should all be balanced out within the frame of the square you’re within. Avoid having a large tote, for example, next to white space and one tube of lipstick. It’ll just look off! If you place something down on your shooting surface, think about how you can balance it out somehow on the other end of the shot. If one side has a lot of pink, add just a pinch of pink on the other to pull the piece together. Similarly, if one side of the photo is totally taken up by one item, make sure the other side has an evenly-spaced something to
Space it out.
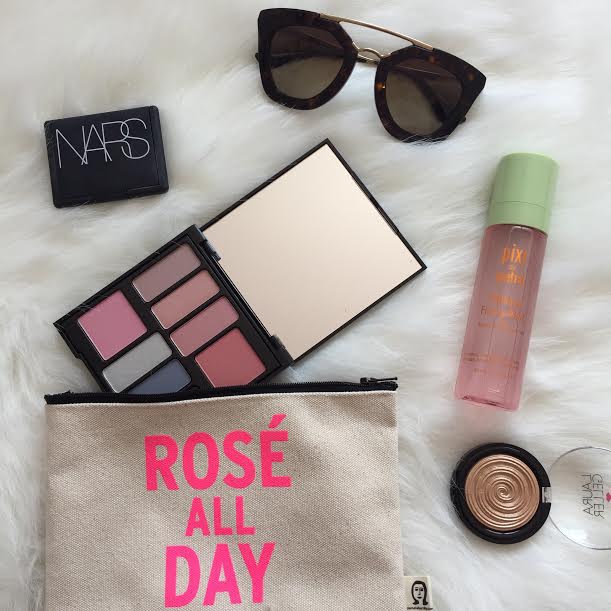
This is the peanut butter to “be balanced”‘s jelly. To truly rock a balanced flatlay, it’s 100% essential that your spacing is in check. You’ve gotta master the spacing between pieces in your flatlay, because it adds to the piece’s overall balance! To check your spacing mid-shoot, take a few overhead pics and then simply look at the picture and analyze – what feels missing? Are there any empty holes that look too empty, or disproportionately empty to everything else? Is there an awkward blank spot between two products where you did not want there to be? Space it all out accordingly! And if adding new product isn’t the answer (because it isn’t always!), try simply shifting the angle of something to fill more space. In this show, I tweaked my sunnies and bottle angles multiple times before landing here, and the Nars palette was a great space-filled to command that white space’s heart.
Natural or nada.
Shoot in natural light. Point blank period.
Zoom in.
The beauty of a flatlay is the ability to offer a near sneak-peek look sometimes, or to offer a new perspective. If you zoom into a shot, it can take on a *totally* different look than if you simply laid things on the ground and took a picture from above. Consider these as a prime example of le do’s and le don’t’s of flatlays. One looks amazeballs. The second…awkward.


Embrace a neutral background – or at least an un-busy one.
Your background doesn’t have to be white – it just has to make sense. A patterned, busy background for your flatlay likely won’t work, because it’ll become cluttered and confusing with everything you’re layin’ out flat. Capiche?
I like to move it, move it.
This one’s a biggie: get MOVING! No, this does not mean add literal motion to your shot. Instead, it means add the illusion of motion to every shot. Instead of having shoes, for example, sitting side-by-side toe-to-toe, set them slightly apart as they would be if you were walking down the street. Fold a piece of clothing in such a way that it looks like you just tossed it down right there and snapped a pic. Instead of looking like you just spent an obnoxious amount of time setting up a fake set up, it looks more realistic AND adds dimension.
Circle it.
With the whole motion point, think of your flatlay in a circular sense for easy motion. If the pieces can be arranged so they effortlessly take the viewer’s eye in a circle around the photo, that’s clutch. This coffeeshop chic flatlay did exactly that by creating a near-triangular shape on the table.
Tell a story that makes sense.
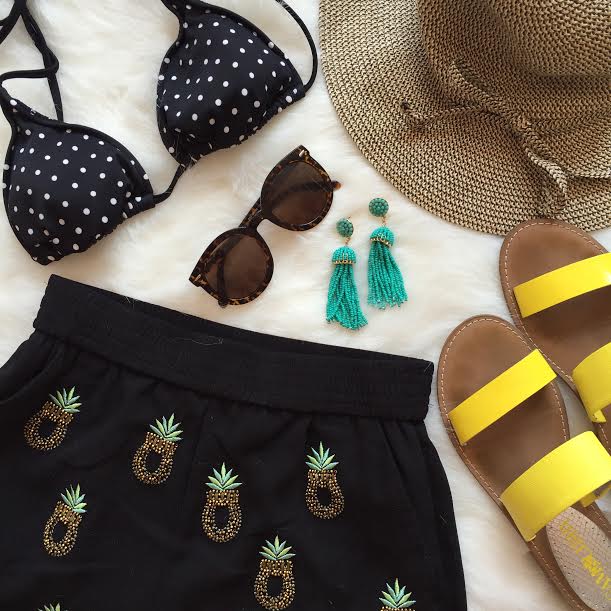
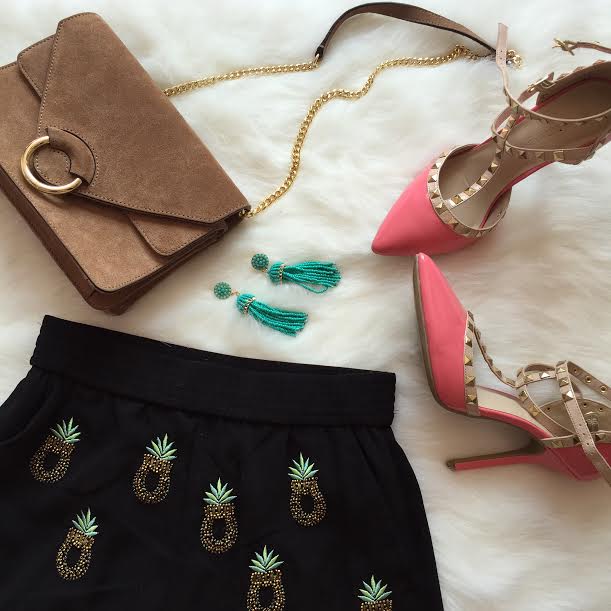
The absolute BEST flatlays out there make you forget that the photographer just spent an absurd amount of time perfectly piecing together and laying out products and clothes for the perfect shot (seriously y’all, a good flatlay can take upwards of 20 minutes to get right + shoot!). So, tell a story that makes sense. Theme it up, go with the flow, and sell the story! Picture A says “I’m off to the beach! Ciao!” Picture B says “I grabbed every cute thing in site and here we go!”
Wipe before you swipe.
Wipe off your iPhone camera lense before shooting. This. is. a. gamechanger. So simple, but SO often overlooked! It’s all about the details in a flatlay. And if the details are fuzzy and out of focus…no bueno. A simple swip with a clean cloth over your iPhone camera lense can make a WORLD of difference in the overall picture quality!
Shoot in square.
Right off the bat, make it easier on yourself by shooting in the mode that you’ll be ‘Gramming in anyways. Instagram posts in square, so shoot in square to ensure all framing is accurate and the flow is exactly as you hope it will be!
Stick with it!
Use double stick tape under any roll-able items (lookin’ atchu, lipstick!). Especially if you’re using a branded product, you might want the brand name to show so that you can tag the brand. When they notice, because you’ll be creating badass shots, they might re-gram it for their own followers (woo!). Whether or not the brand name is showing could be the difference as to whether or not they decide to re-purpose your shot for their own brand use (and potentially pay you to do so, woo WOO!). This cylindrical perfume bottle + fabulous mascara? They’re taped down for good measure!
Edit the good stuff.
You can find my 5 favorite mobile photo editing apps here. Especially with flatlays, if you’re shooting in natural light, not too much editing should be needed. But, evening out colors and brightening up space to add a bit of clarity to your image is always a good thing!
What’s your favorite iPhone flat lay photography tip? And where do you look for flatlay inspiration?
I’d lovelovelove to hear your favorites inspiration sources, because I’m always looking to check out beautiful setups! One of my personal favorite flat lay photography is livvylandblog on Instagram! Drop me a comment with any recommendations you have…I’ve gotta hear! Plus tweet Sarah here to say hello and welcome to the team. She’ll be tickled rosy pink. 😉
P.S. is having a two-day-only hot designer sale, so I had to letcha know! Y’all know anytime I splurge on *anything* you can bet it was on s-a-l-e. 😉 Enter code at checkout to save 25% on your whole shebang! Here are my fave shoe picks from the sale (like – um YAAAS honey):


